


SAMPLE STORAGE
Contact support@Species360.org
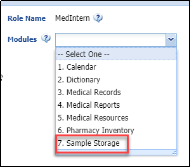
IMPORTANT NOTE! Sample Storage functionality is automatically assigned to the Medical Admin (Species360) and Veterinarian (Species360) Roles. For any custom Medical Roles that have been created, you will need to assign this functionality if desired.
For help with Medical Roles see Medical Roles .
Topics Covered
Sample Storage Overview
Create Storage Locations
Using Templates
Viewing the Locations Tree
Place Samples Into Storage
Managing Stored Samples
Viewing the Grid History
Reports
Metrics and Statistics
Samples with a Purpose
Sample Storage Overview
Many institutions maintain an inventory of biological samples from their collection animals and the Sample Storage module allows an institution to track what samples they have stored, the location of those samples and whether the sample has been reserved for a specific purpose or project. Sample types include; serum, plasma, feces, urine, tissue, semen, blood smears, etc. Samples may be stored frozen, dried or preserved. While vials of serum and plasma in a freezer are typically the most common samples placed into storage, ZIMS has the flexibility to track other samples held in other environments. These could include plucked hair samples in envelopes on a cabinet shelf, cell cultures in liquid nitrogen tanks or stained blood smears on glass slides. The ZIMS Sample Storage module helps you to manage all those sample storage details and maintains a link to the animal and the sample collection details.
The Sample Storage module is found under Start > Medical > Sample Storage. You can drag this to your desktop for quick access.
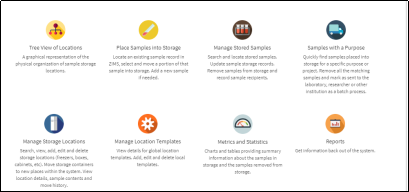
The Sample Storage module home screen has 8 submodules that organize and group related functions:
- Tree View of Locations: A graphical view of the storage location hierarchy.
- Place Samples into Storage: This submodule allows the user to locate existing medical sample records and move a portion into storage or create a new sample and store that sample.
- Manage Stored Samples: Search and view stored samples and their storage history. Update those samples records or remove a sample and track the recipients of sent out samples.
- Samples with a Purpose: Locate and view a summary of samples that have been stored for a particular purpose or project.
- Manage Storage Locations: Create and update information about the specific locations used to store samples.
- Manage Location Templates: Template allow rapid addition of complex locations, such as box containing an internal grid with 100 storage spaces.
- Metrics and Statistics: Charts and tables providing an overview of stored sample data.
- Reports
The main Sample Storage home page is a visual display of the topics contained within it, with easy to interpret icons. Click anywhere within the tile to open it.
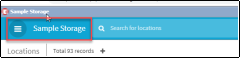
You can always get back to this home page by selecting Sample Storage in the upper left hand corner.
Back to Topics Covered
Create Storage Locations
Before you begin placing samples into storage you need to create your sample storage location hierarchy. This hierarchy is very similar to the Husbandry module’s Enclosure Tree. Just as an animal cannot be moved into an enclosure until the enclosure has been defined within ZIMS, a sample cannot be placed into storage until the storage location has been defined. Initial ZIMS activity will revolve around defining and creating the virtual storage locations that reflect the existing (or planned) physical storage locations. Once the initial storage hierarchy has been created, additional storage locations will only be created as the storage system expands to accommodate new samples (e.g., a new box is added).
Storage locations are created through the Manage Storage Locations submodule
-
Some storage locations (e.g., a box with an internal grid) hold a fixed number of samples
- Each individual space within the box can be defined and labeled as a separate, and very precise, storage location
- Creating a storage box location with an internal grid that is 10 by 10, requires defining 101 storage locations (the box plus 100 internal storage spaces)
-
Location Templates allow a storage box along with the entire internal grid to be created using a single add screen
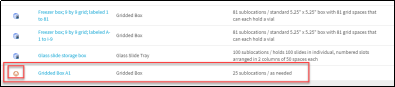
- Templates for commonly used freezer storage box with 8 by 8, 9 by 9 and 10 by 10 grids have been defined by Species360 staff and are available for use by members
-
The 2 most commonly used grid label systems are supported:
- Simple numbering labels: e.g., 1 to 64 for an 8 by 8 grid
- Letter Row/Number Column labels: e.g., A-1, A-2, … H-7, H-8 for an 8 by 8 grid
- If other sized boxes are being used for storage, additional templates can be created through the Manage Location Templates submodule
-
Storage Locations are created and placed within a hierarchy that typically reflects the physical organization of the storage locations
-
Grid spaces are defined within a box
-
that may be placed within a rack
-
held within a freezer
- housed at the institution
-
held within a freezer
-
that may be placed within a rack
-
Grid spaces are defined within a box
-
Every level of the hierarchy is named and the system supports as many levels as needed. The user chooses and defines the storage locations to meet their needs
- this can result in very precisely defined storage location that allows for rapid sample retrieval
e.g., the serum vial is in … Freezer #1 > Rack 12> Box 52 > grid space 38
- equally, the system can support a less precise storage location system, where sample retrieval may require more effort
e.g., the bag of tissues is in Freezer #1
- Most institutions use a mixed organizational system with the majority of samples in precise storage locations, but with some samples in less specific locations
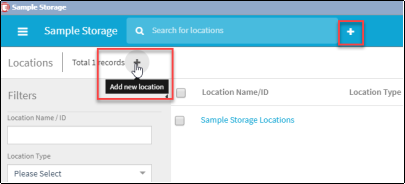
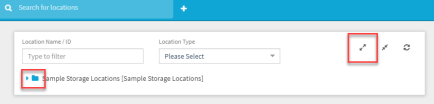
To start creating locations, select the tile to “Manage Storage Locations”. Initially, the only Sample Location will be Sample Storage Locations. Select either of the plus sign buttons to add a new location.
You can create any hierarchy structure that works for your institution, but if you are uncertain how to begin, consider a simple tiered approach.
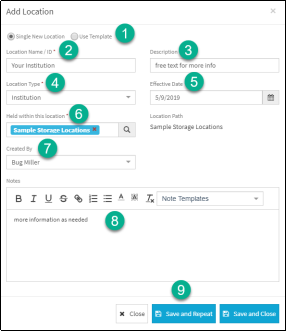
1.You can add a single new location or use a template (see more details below for templates).
2. Create the highest node first, then create the sub locations that will exist under it. Your institution will be the highest location on the tree. Then add buildings, rooms, freezers, shelves, box racks and then gridded boxes as needed.
3.Use the Description box for more information as needed.
4.The Location Type is a data standard drop down list.
5.The Effective Date defaults to today. You can change it if you want but it will not impact when you can put samples into it.
6.When you add the first Location, the only option available for this field is Sample Storage Locations. As you add other Locations they will become available to select from.
7.Add who created this Location if desired.
8.Use Notes to provide additional information.
9. The most efficient way to create an organized and structured location hierarchy is to use the Save and Repeat button so you can create the next level of the hierarchy and work your way down.
Below we are adding a Hospital Building.

1.The Location Type is now a Building.
2.Because we added Your Institution as a Location it is available to select from.
3.The Location Path is now expanded.
4.Various Location Types will activate a field to record the Nominal Operating Temperature.
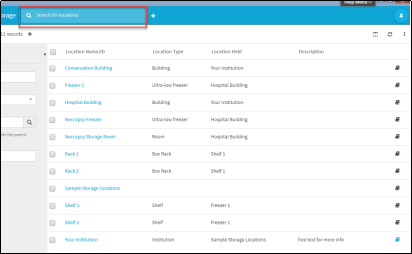
We continued to add Locations and they are now displayed along with the original Sample Storage Locations. You can search for Locations using the Search box.
For more details watch the video at https://vimeo.com/352167115
Back to Topics Covered
Managing Storage Locations
From within a location record you can manage them using the three-dot actions button. You can Edit or Delete the location or Move to Another Location.
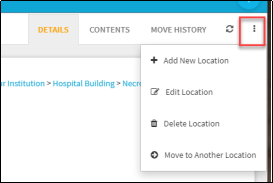
The information that you can Edit in a location are:
- Location Name/ID
- Description
- Effective Date and Created By
- You cannot Edit the Location Type or the Location Path.
Sample storage locations that have never held a sample can be safely deleted from the location hierarchy. However, sample storage locations that previously held samples but are currently empty cannot be deleted, they will be marked obsolete when you attempt to delete them.
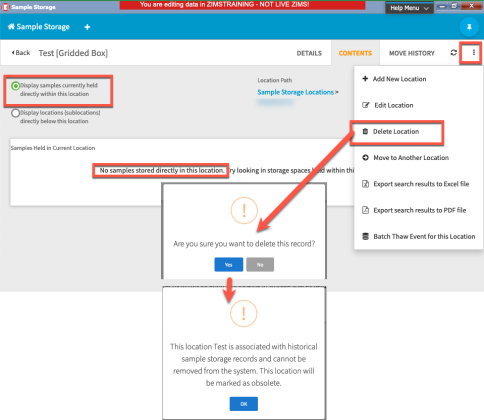
Locations currently holding samples cannot be deleted or marked obsolete until all samples have been removed. If samples have previously been associated with this location, you will receive a message that the location will be marked as Obsolete instead of Deleted.
If you select to Move to Another Location you can record the Move Date, New Location and the Responsible Party.
Back to Topics Covered
Using Templates
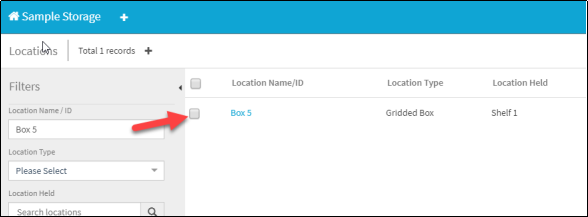
To create a gridded box or a cyrocane, consider using one of the Templates created by Species360. Select “Manage Storage Locations” in the Sample Storage home page. Below we are adding a Gridded Box to Shelf 2.
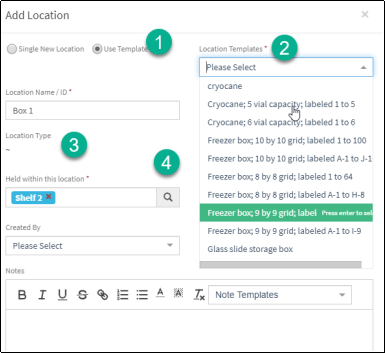
1.We selected to Use Template.
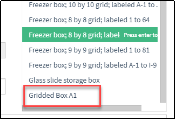
2.The available Templates appear in the drop down for selection.
3.When using Templates, the Location Type is not an editable field.
4.We used the lookup magnifying glass to find the appropriate Held within this Location.
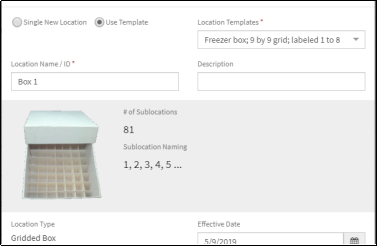
When a Template is selected an illustration will appear to help you confirm that your selected the appropriate Template.
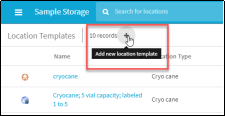
If you have some frequently used location types, you may also create local Templates that can be used again in the future. To create a Template, click on the Sample Storage home page tile “Manage Location Templates”. Select the Add New Location Template plus icon.
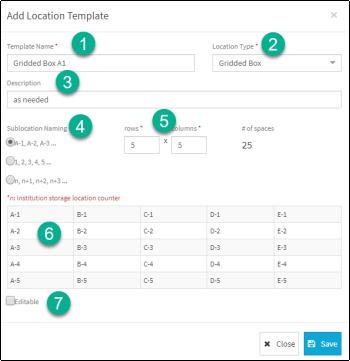
1.Give the Template a unique Template Name
2.Select the Location Type from the drop down list. Currently, ZIMS only supports templates with structured sub locations such as gridded boxes, cryocanes and glass slide trays. All other location types can be very rapidly adding one at a time using Save and Repeat function as mentioned above.
3.Provide a description as needed
4.Select the desired Sublocation Naming
5.Select the number of rows and columns
6.The grid will display for confirmation that configuration was what you wanted
7.Check if you want others to edit the Template
The Template will display as a Local Template in the Manage Location Templates list and will be available for selection next time you want to use a Template.
For more details watch the video at https://vimeo.com/352167115 . Templates are near the end.
Back to Topics Covered
Viewing the Locations Tree
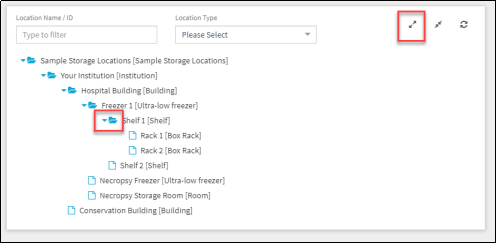
You can view your storage location hierarchy as a tree by selecting Tree View of Location in the Sample Storage home page. Expand the Tree by using the expand icon or clicking on the expand arrow to the left of Sample Storage Locations.
You can filter by location name or type. A blue notebook indicates there is a sub location under that node. You can expand each node one at a time using the arrow, or use the expand icon to expand the entire Locations Tree.
Back to Topics Covered
Place Samples Into Storage
Once your locations are established, you can begin using the structure you have created to record where your Samples are stored. The sample collection information is usually already recorded in ZIMS. Samples being placed into storage are often collected as part of a medical examination with diagnostic testing performed on some material and one or more portions stored for future needs. For more information on Sample Collection see Samples . Many members are already recording sample collection as part of a patient medical record and linking it to test requests and results. For more information see Tests and Results .
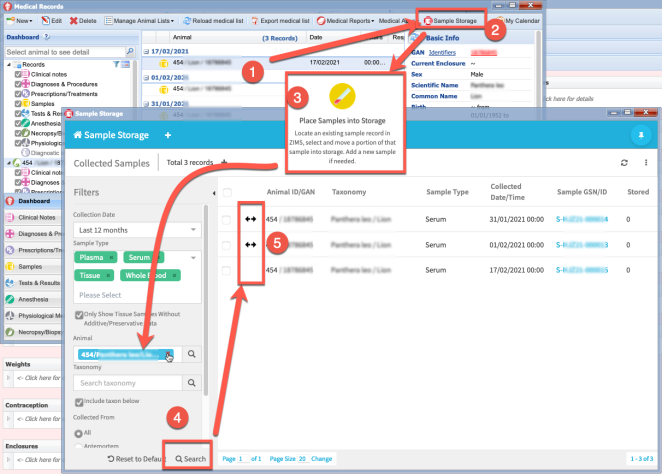
Once the sample has been registered in ZIMS, from the Sample Storage home page you will click on the tile to “Put Samples into Storage”. NOTE: This option is also available under the Samples and Tests tab in a Necropsy record and above the Preview Pane in the Medical dashboard. See Pathology for Necropsy details.
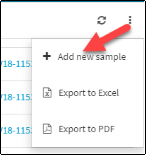
If you have arrived at the Collected Samples screen and the Sample has not yet been recorded, you can record that Sample by clicking on the plus button or Add New Sample from the Actions menu and entering the required data fields.
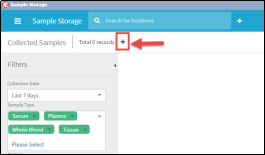
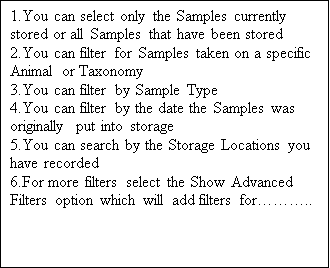
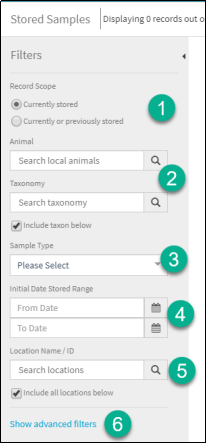
To view your Samples, you will select the appropriate filters:
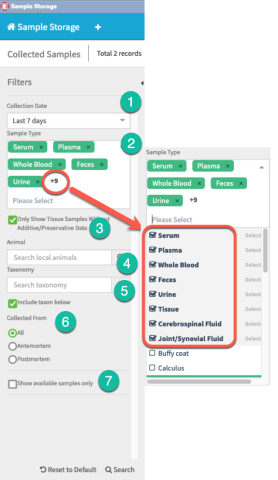
- The date range defaults to the last 7 days but can be edited
- Common Sample Types will display as the default but can be removed (use the “x”) and others added (use the arrow) or type in at Please Select.
- You can filter by only samples with no additive/preservative data
- You can search by Samples taken from a single animal using the GAN or Local ID
- You can search for Samples taken from a Taxonomy
- The default is All Samples but you can filter by Antemortem or Postmortem Samples
- You can select to view only Samples that are marked as Available. If your team is consistently marking clinical samples as consumed when the entire volume is submitted to the lab, you can remove these from view by clicking on the check box to “show available samples only”. If the sample status updates are not consistently applied, we recommend you do not use this check box or you may not see all your collected Samples.
Note, if you have additives for the sample registered in the Sample Record, this will display along with the sample type.
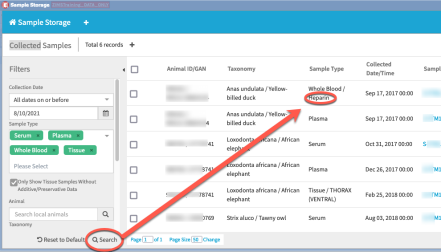
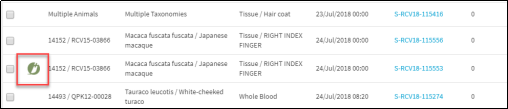
Once you select your filters and select to Search, all Samples matching those filters will display. If the Sample was collected during Necropsy, the green Necropsy Icon will appear. All others were collected prior to death.
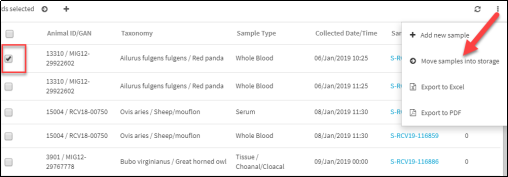
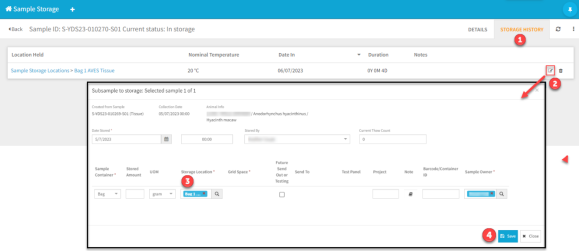
Select a sample (or multiple samples) and choose Move Samples into Storage from the actions menu.
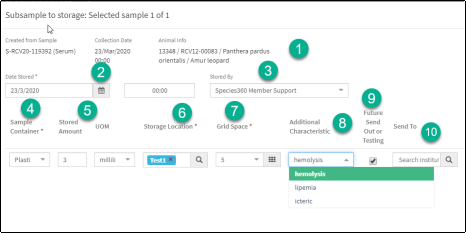
Left side of screen:
- Note that the sample collection details and animal details cannot be edited when moving the sample to storage. To edit that information, you must edit the sample record within the Medical dashboard.
- The date will default to the collected date but can be edited. The time may become important when recording multiple Samples.
- You have the option to record who stored the Sample
- Select the Sample Container from the drop down list
- Record the volume stored
- The most recent Storage Location used at your institution or the next available box in a gridded box will be the default but can be edited. You can record the Storage Location if you know the Name by typing it in. This is a type ahead lookup so you will see possible matches right away. If you are unsure, use the magnifying glass lookup. This will open your Storage Location Tree and you can select from there. Note, you can double click on the ‘node’ within the tree to select, or highlight and scroll down to select.
- If the location is a gridded box or has sublocations, record that here. You can click on the icon to view the occupied and unoccupied grids or sublocations.
- If the quality of the Sample has changed since it was collected you can update that information here.
- Check this box if you will be sending out or testing the Sample in the future.
- Record where you will be sending it. NOTE: This sample now becomes a Sample with a Purpose. See Samples with a Purpose below)
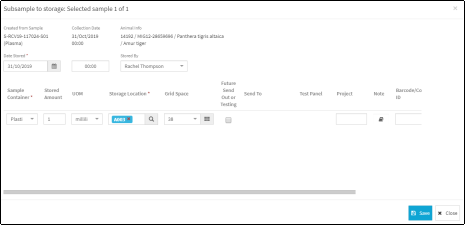
Right side of screen:
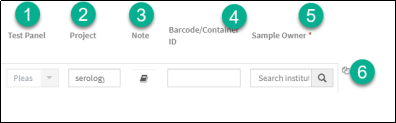
- If a Test Panel is available you can select it here
- If the Sample was collected for a specific project, record that information here. Use the arrow to display recent projects to select from, or record a new one
- You can add a Note if appropriate.
- Add a barcode or container ID as appropriate
- Record the Sample Owner
- If you are storing several vials of the Sample, you can save data entry time by clicking on the copy icon on the far right of the row. A new row will appear and the next available space in the grid will prefill but is editable.
The Sample in the list will now display that it is stored in two locations.
If you have selected multiple samples from the Sample list, you can record storage information as described above for the first sample in the list, and then when you Save, you will enter the storage information for the next sample in the list, and so on. The number of the Sample and the details will display at the top of each record.

For more information watch the video Putting Samples Into Storage .
Back to Topics Covered
Managing Stored Samples
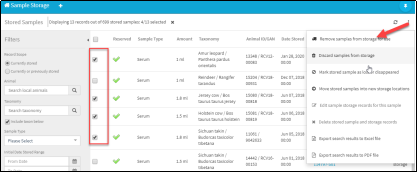
Your Samples in storage can be removed for testing, discarded due to contaminate or even lost. When you perform any actions that remove the Sample from storage such as removing for use/testing, discarding or marking as lost, the Sample will be removed from the Stored Samples list. You can also move them to a new storage location. These actions can be performed from the list of Samples or from within the sample record itself. To move or remove stored Samples click the “Manage Stored Samples” tile on the Sample Storage home page. When you first open this screen there are no Samples displayed and you need to make a selection from the filters on the left hand menu to narrow the number of results.

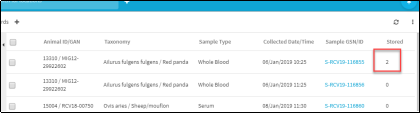
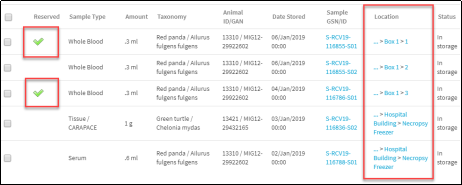
We have done an open search with no filters applied. The results grid shows that two Samples have been marked as Reserved for a Project. The Location column indicates where the Sample is stored and is a hyperlink into the record for the location. The Sample GSN (Global Sample Number)/ID is a hyperlink to a screen displaying details about that sample and the storage history
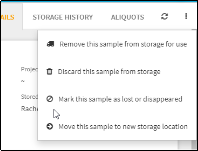
To manage the Sample, check the box and from the Actions menus select the action you want to take on that Sample. You can check more than one box and perform Batch Actions.
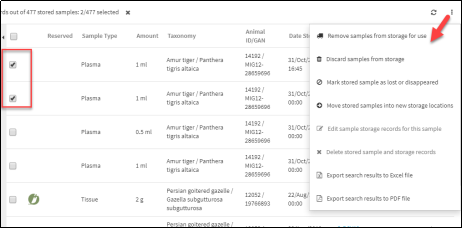
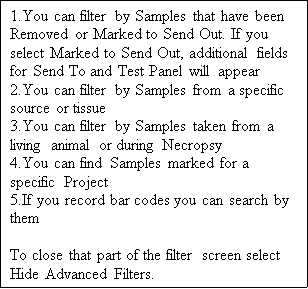
Remove Samples from Storage for Use
You may remove a sample from storage to run tests on or you may be sending it to another institutionin response to a research request, regional biobank, or a referral laboratory. For laboratory tests, test panels that exist for that lab can be selected. The test results will be entered via the medical dashboard.
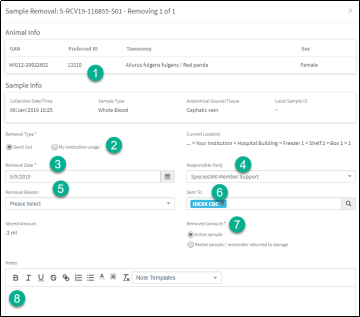
1.The Animal and Sample Info will display and is not editable
2.You can select to send the Sample out, or keep it at your institution for testing
3.The Removal Date will default to today but is editable
4.You can record who removed the Sample from storage
5.The Removal Reason is a data standard list to select from
6.If you selected a lab when you recorded the Sample it will display here but is editable
7.You can select to send out the entire Sample or just some of it
8.Any additional Notes as desired
If you select to remove only part of the Sample, additional fields will display to record the amount of the Sample removed, the Container Type and thawing information.
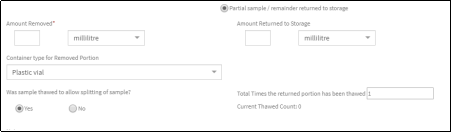
The remaining Sample will be placed back in storage and the amount adjusted for the partial removal. The partial removal will display in the Storage History tab for the origin sample.

Example: User wants to test “cats” in the collection for antibodies against a viral disease. The stored serum and plasma samples can be searched for Felidae samples collected during the past 6 months, and the results grid sorted by Animal ID/ GAN. The user selects samples from a number of different animals on the results grid, clicks on the Action menu and selects the “Remove from storage” option. The entire batch of samples can be removed as a single activity with the user able to record the laboratory used for testing, the test panel requested and with other sample removal information.
NOTE: Test results can be entered via the medical dashboard. Note the test request and test results will be dated after the sample collection record. For in house lab testing, any test panels you have created for your institution can be selected. For treatment (ie: plasma transfusion, artificial insemination)- detailed information may be entered into the patient clinical notes, those may also be copied into sample removal notes if desired. For details on Tests and Results see Tests and Results .
Discard Samples From Storage
The Sample may have become degraded in quality or is simply no longer needed and storage space is limited.
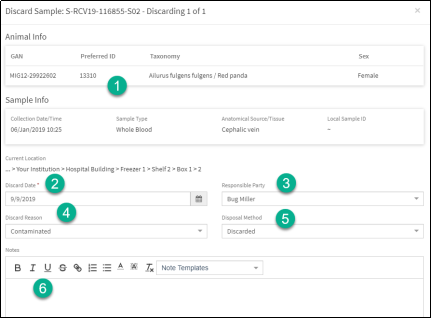
1.The Animal and Sample Info will display but is not editable
2.The Discard Date defaults to today but is editable
3.You can indicate who discarded the Sample
4.The Discard Reason is a data standard list
5.The Disposal Method is a data standard list
6.Add any Notes as needed
Mark Stored Sample as Lost or Disappeared
The Sample is no longer in its location and you have no information about what happened to it.
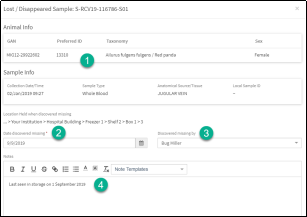
1.The Animal and Sample Info will display but is not editable
2.The Date Discovered Missing default to today but is editable
3.You can record who discovered the Sample missing
4.Notes may be important here such as indicating when the Sample was last seen in its location
Move Stored Sample into new Storage Locations
You may need to transfer a stored Sample from one location to another. For example, you may consolidate Samples for a research project.
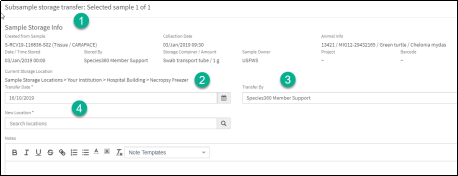
1.The Sample Storage Info will prefill and is not editable
2.Record the date the Sample was transferred
3.Record who transferred the Sample
4.Record the new storage location. You can use the lookup to find it is needed.
Edit Sample Storage Records for this Sample (not available as a Batch Action)
You may need to edit records for stored samples. Select the edit icon.

All fields are editable.
Delete Stored Sample and Storage Records (not available as a Batch Action)
Be very careful if you select to Delete Subsample and Storage records. This will remove the initial storage record, all associated storage records and the corresponding sample record in the medical records.
You can also manage your samples from within the sample record. The following options are available:
The screens for each action are the same as the ones when you navigate from the sample list screen as shown above.
What if I accidentally store a sample in the wrong place?
You can edit an incorrect storage location by finding your sample ID then:
1. Select storage history
2. Click the edit icon to open up the details tab.
3. Edit the storage location by clicking the red x and retype the correct location.
4. Save to update the location.
For more information watch the video Managing Stored Samples .
Back to Topics Covered
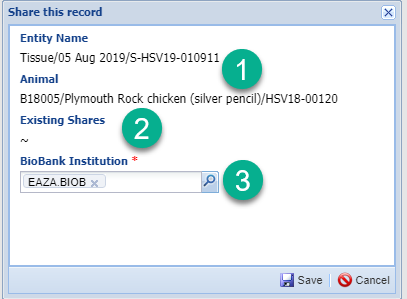
Sharing Samples
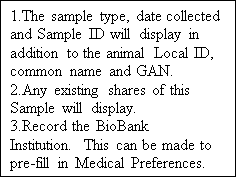
Sharing Samples (single record sharing) was created so you can share a Sample record with a Bio Bank and they can record storage details for it. They will not be able to change any of the sample collection information. At this time, this functionality is intended only for use by EAZA member institutions. You can only share a parent sample; no subsamples can be shared.
To share the Sample, highlight it in the dashboard and select Share This Record above the preview pane.
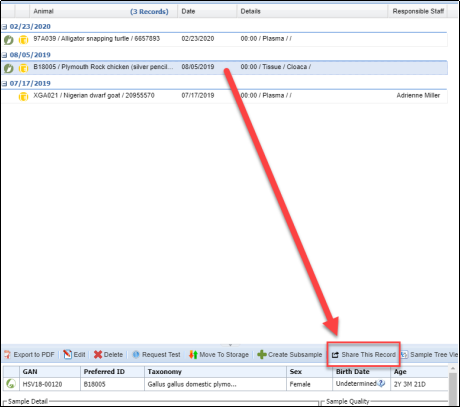
The shared sample will display in the External Sharing grid in My Institution.
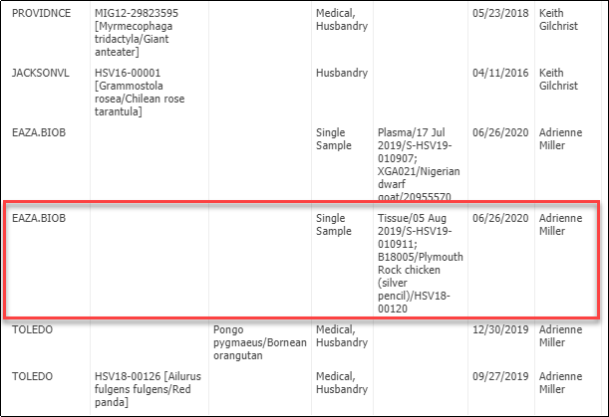
The BioBank can now find the record in ZIMS and record storage information.
Records previously shared will be marked with this icon in the Sample Storage search results:
<- ->
To determine if a record is already shared:
- From a sample record in the medical dashboard
- Open Sample Storage module
- Choose, Place Sample Into Storage
- Search for sample by specific animal (or other search terms)
- When viewing the samples in the search results grid, rows marked with the <- -> sharing icon have already been shared.
Back to Topics Covered
Viewing the Grid History
The ability to easily view all the Samples stored in a grid location over time can be very useful especially for correcting historical data entry errors. To view the history, search for the Box using Manage Storage Locations.
Select the Location hyperlink. Go to the Contents tab and select the “Display locations (sublocations) directly below this location” radio button. Any grids with historical Samples will display with a counterclockwise clock arrow to the right.
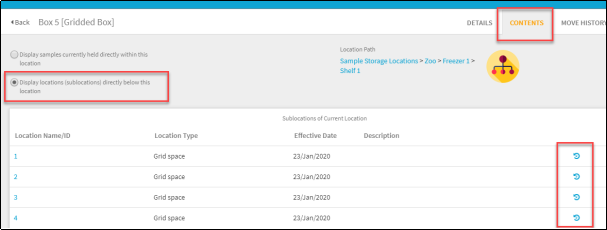
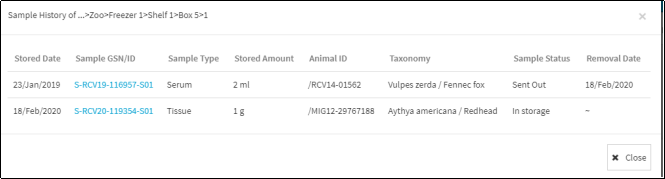
Selecting this icon will display the current Sample and any other historical Samples held in the grid.
You can also view the history of a grid when you are moving a sample into storage by selecting the box icon to the right of the Grid Space.
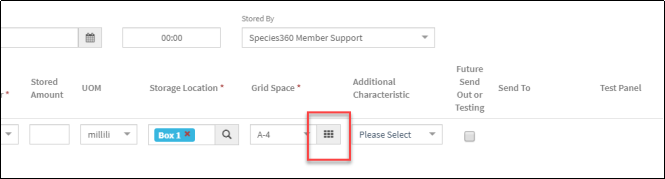
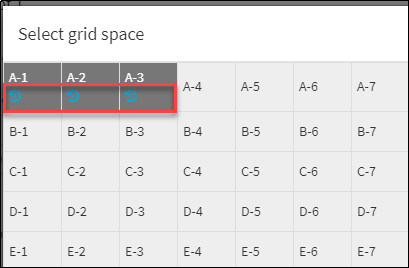
This will open the grid space display. If the grid space currently, or historically, held a sample, the counterclockwise clock arrow will display to view the history.
Back to Topics Covered
Reports
The Stored Samples Report lets you search for samples using Animal, Sample and Storage filters. You can also select formatting for the final Report.
Animal Filters:
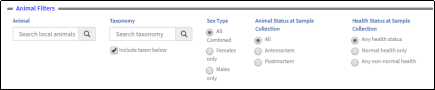
Sample Filters:

Sample Type is a multiple select dropdown list.
Storage Filters:
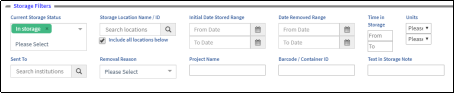
Current Storage Status defaults to In Storage but you can use the multiple select dropdown list to select other Statuses as desired.
Report Output Format:
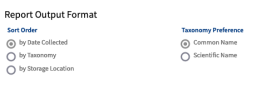
Remember to select the Sort Order that you want the Report to display.
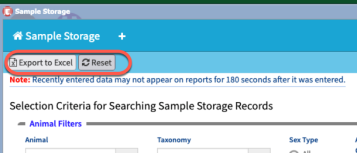
1. Export the Report to Excel is the default output. Note, reset will clear all filters.
Back to Topics Covered
Metrics and Statistics
ZIMS has generated some useful metrics about your institution’s Sample Storage.
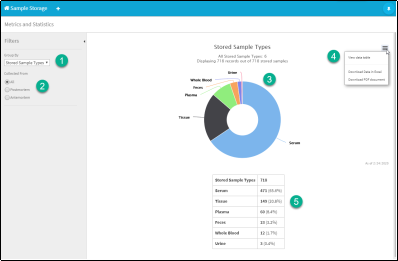
1.You can group by Stored Sample Types or Stored Taxonomies
2.You can select all Samples or just those collected Postmortem or Antemortem
3.A pie chart will display as per your filters selected. Hovering over the pie piece will display a count of that Sample Type.
4.You can select to view the data in a chart presentation (5) or download the data to Excel or pdf
Back to Topics Covered
Samples with a Purpose
Samples with a Purpose allows you to find samples that were placed into storage for a specific purpose or project. When you place a sample into storage you have the option to select a checkbox for Future Send Out or Testing and the institution you will be sending it. The sample can also be tied to a specific project. (See Place Samples into Storage above).
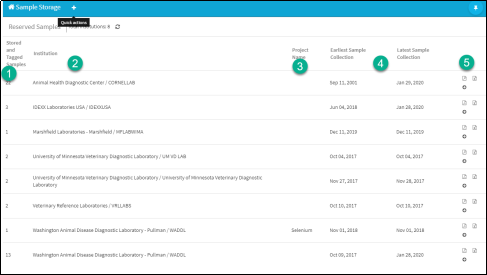
1.The number of samples tagged
2.The institution they will be sent to
3.If the sample is part of a specified project
4.The dates of sample collection
5.Use the icons to export to Excel or pdf or send the samples (or some of them) out
Selecting the arrow icon will bring up the screen to send the samples out. You can removes samples one by one or easily do a batch send out by checking the sample and selecting Remove samples from storage for use option under the Action menu.
This will bring up your sample removal screen. All samples removed by batch must have the same removal type, removal date, responsible party and other removal data, otherwise they should be removed individually. See Managing Stored Samples above).
Back to Topics Covered
Revised 5 March 2025