


Enclosures-Add New
There are two ways to add a new Enclosure. You can use the Add New button at the top of the Enclosure module or you can add directly from the Enclosure Tree.
From Add New:
Open the Enclosure module either from the desktop icon or from the Start menu. Select Add New.
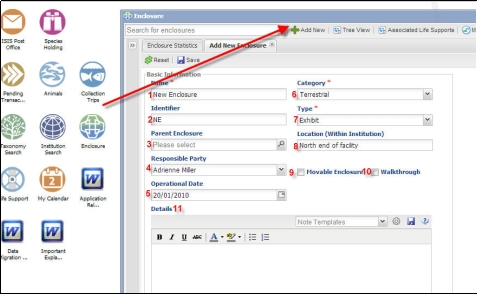
1) Name - This must be unique within your facility. It is recommended NOT to use occupant species names as occupants can change
2) Identifier - a shortened version of the Name
3) Parent - the enclosure one level above the new enclosure in the enclosure tree. If you do not enter an enclosure, the Parent will default to your top level enclosure
4) Responsible Party - sources from Staff list
5) Operational Date - if a date is entered here an automatic maintenance status of Operational is created. In addition, if you try to move an animal into an enclosure before the Operational Date you will receive a warning message, although it is allowed.
6) Category - terrestrial (land) or aquatic (water). Environment Measurements can be taken on Terrestrial enclosures. Water Quality measurements can be taken on Aquatic enclosures. Terrestrial enclosures also have a Water Body tab. The default Category can be set as a Preference.
7) Type - terms are filtered by the Category selected. Type can also be set as a Preference.
8) Location - free text field for where the enclosure is located within your facility
9) Moveable - enclosure can be moved elsewhere
10) Walkthrough - guests can walk through the enclosure
11)Details - free text field for additional information about the enclosure
From the Enclosure Tree:
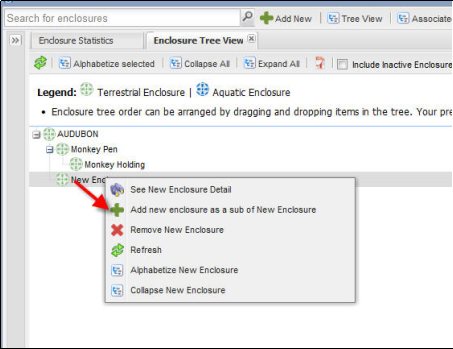
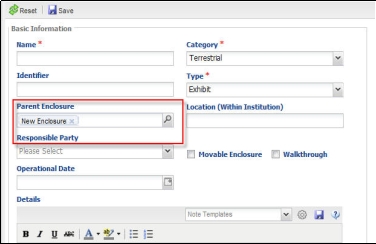
From the Enclosure Tree > right click on the desired Parent enclosure > Add new enclosure as a sub of selected enclosure. The Add New screen is the same but the Parent Enclosure will prefill with what you selected.
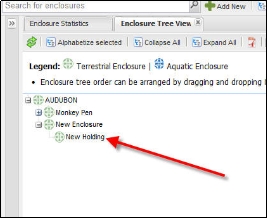
The new enclosure will appear underneath the Parent enclosure in the tree.
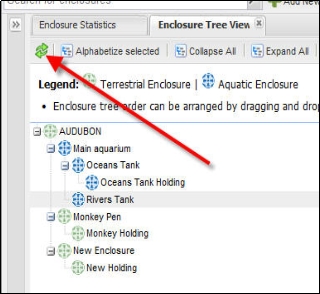
If new enclosures have been added but are not showing up in the tree, you may need to select the Refresh button.
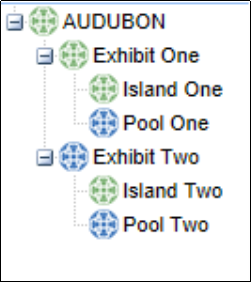
Enclosures are not always simply Terrestrial or Aquatic. Sometimes there are enclosures that contain both Terrestrial and Aquatic features and the animals can go back and forth between them. Below is an example of a tree for two penguin exhibits. Exhibit One is mainly land so that has been created as the Parent enclosure. A child Aquatic enclosure, Pool One, has been created so that Water Quality Measurements can be taken. Exhibit Two is mainly water with a small island so the Parent enclosure is Aquatic. The island is a child enclosure and Environmental Measurements can be taken on it. In both examples the animals would be recorded as occupying the Parent enclosure.

For exhibits that have both land and water but the occupants do not go back and forth you have another option for your tree organization. An example is a large island that displays eagles and a surrounding moat that displays native fish. You can create a Parent Exhibit that you don’t actually put animals into. Then create the Child exhibits, one for the land and the other for the water. If you run a report for the Parent enclosure you will be able to include all animals recorded into both Child enclosures.
Revised 5 March 2025
It is the mission of Species360 to facilitate international collaboration in the collection and sharing of information on animals and their environments for zoos, aquariums and related organizations.
www.Species360.org – Global Information Serving Conservation