


Using ZIMS to track Biofacts at your institution
In instances when items such as animal bones, skins, organs etc. are kept in the collection after an animals death, there are various ways to record details about these biofacts.
Topics
Transactions
Identifiers
Enclosures
Notes and Observations
Note Retrieval Report
Transactions
When dispositioning the animal that will become the biofact, (1) record the death as normal, completing any relevant information. (2) When selecting Carcass Disposition, select “Sent Out (Part or Whole Body)” – note, this was previously termed “Convert to Sample”, this will enable the (3) Edit Carcass button.

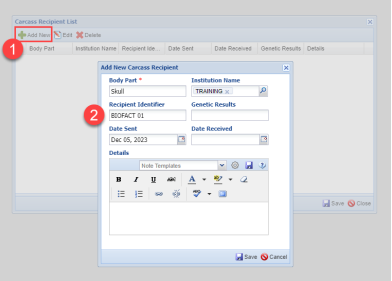
After clicking the Edit Carcass button the Carcass Recipient List will open. (1) Click ‘Add New’. (2) a pop-up will load where you can record body part(s), where it was sent, identifier assigned there, genetic results, date sent and received, and additional Details.
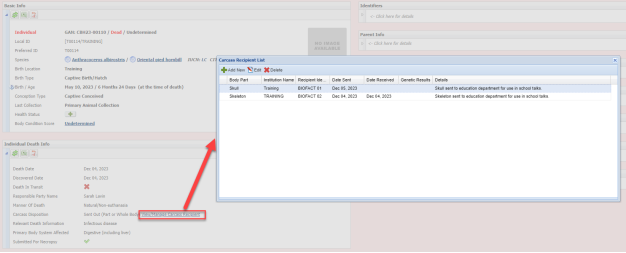
Individual Death Info
The individual Death Info box can be found under the Basic Info box on an animals record once a ‘Disposition – Death’ transaction has been recorded.
Within this box the Carcass Recipient List can be viewed and managed to track where parts of the carcass have been sent in detail.
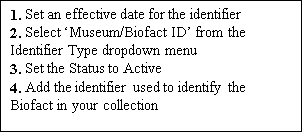
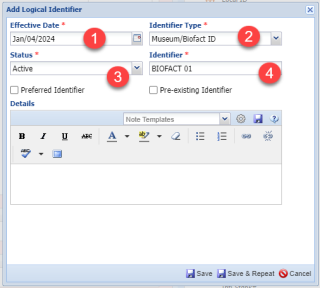
Identifiers
Use the Identifiers box on the animals record to record a Museum/Biofact ID, this can be done by adding a new ‘Logical Identifier’. This will make the biofact easier to search from the search bar. Some animals may become multiple biofacts, if this is the case, multiple Museum/Biofact ID’s can be associated with one animal record.
Enclosures
Create an Enclosure to act as place to organize/list animals that have been kept as Biofacts. See the Add New Enclosure help document for more information on creating Enclosures.
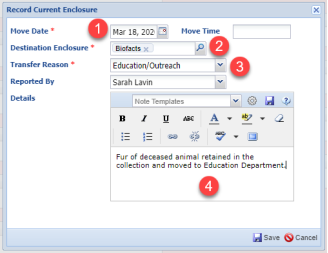
Move the deceased animal into this Enclosure through the Enclosures box on the animals record by selecting ‘Record Current Enclosure’ and completing the pop up box.

Enclosure Occupants
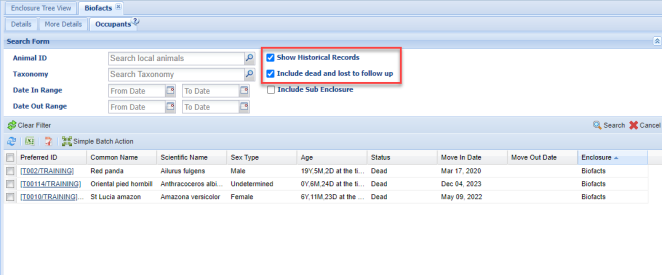
Use the Enclosure Occupants tab to view which Animals have been recorded in the Biofacts enclosure. Ensure the checkboxes ‘Show Historical Records’ and ‘Include dead and lost to follow up’ are checked.
This enclosure will simply act as a place to find which animals have been preserved as Biofacts and will not work to track where multiple parts/items of an animal are if they are kept in different locations, details on this are better kept in Notes/Observations.
Notes and Observations
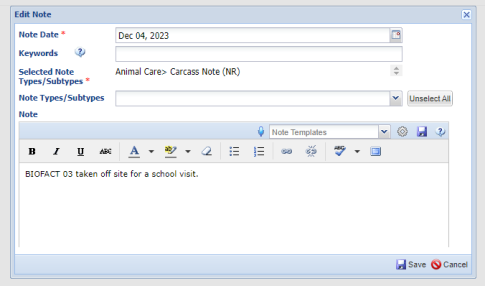
Use the ‘Carcass Note’ Note type to log any information pertaining to the biofact, this might be further details on where in the institution the parts are stored, what it is used for, notes on condition etc. Using this same Note Type will make it easier to retrieve Biofact related information on this animal at a later date through the Note Retrieval Report.
TIP! As the biofacts are just a continuation of the animals record after it’s death, education teams might find it useful to explore the animals record to learn more about this animal including birth/death dates, weights, pedigree and much more information to build a story about the Biofact.
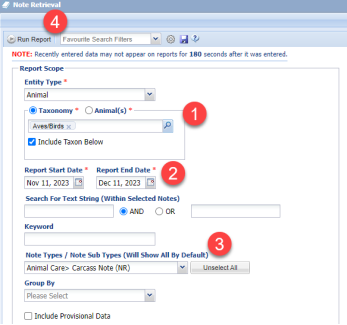
Note Retrieval Report
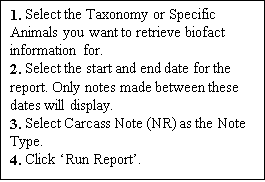 Use the Note retrieval report to retrieve information on Biofacts.
Revised 5 March 2025